Sunday, October 27, 2013

ReBoot: Back to Simple

My last post was a few days before my 51st birthday. Little did I know that the first half of my 51st year would be one of my most challenging years so far.  I had set out on my return to sewing with this dress/tunic, which is still unfinished due to unfolding events:
I was having surprising trouble with the way the dress hung and fit on me. Now, I knew I was out of practice but I didn't think I was that bad. Everything was fitting in general but it looked strange on me. It turns out there was a very good reason. I set the dress aside thinking the issue was perhaps the style that no longer flattered. In the midst of all of this I suddenly took a job at a local clothing store. For those who don't know, I live in a coastal town with a local population of about 735 full-time people that swells during the summer with visitors and vacation/second home owners. Our little clothing stores are able to make it by being unique and hard-working.
I joined a higher end women's clothing store. It was a fun job but also very tiring. I was constantly moving and on my feet all day along side the wonderful owners. Through all of this, my body was changing at an alarming pace. 
I went to the doctor and that started a chain of events which led me to having surgery to remove a very large benign tumor on my ovary in addition to the ovary itself. How large? They told me it was the size of a 5 month pregnancy! I lost 17 pounds overnight due to the surgery. Ugh! No wonder I was having such trouble getting this tunic to fit correctly. I have been recovering these last two months and am starting to finally feel solid. My small breasts are once again bigger than my belly and I can see my toes!
All this has been a bit stressful but thankfully I am able to recover and start again. I will say the biggest and hardest hit I have taken these past couple of months has been the loss of my beautiful 13 year old dog Twill to bone cancer.
I am sharing all of this for a couple of reasons, it affected my attempts at sewing and has pretty much forced me to rethink and restart my life, as these things will. I know I am not alone in this experience and I definitely know how fortunate I am.
So that is done. I am selectively picking up the pieces and getting my priorities realigned. I am back to painting, cooking healthy gluten-free vegan meals, and now, back to trying to fit in some desperately needed sewing! I decided to start simple and back to basics. Fall is here and the weather is getting chilly. I am a plein air painter and I am finding I already need some hand warmers when I am out painting on the beach so...Ta Da!!!
Of course, I used a fleece remnant I had on hand which is a little on the thick side but they fit, a little snug, but they will work. The snug fit also makes the seam pull over slightly. I will make more with the proper weight and stretch fleece in the future. What I have here is a finished sewing project. I feel better already! I did use a pattern:
The pattern and instructions were just fine but since the fleece I used was a bit too bulky I ended up snipping the thumb seam off and whip-stitching the raw edges together so it would fit smoother. I think the proper material will be perfect. I don't want them too loose as they would get into the paint.
I am thinking of sewing some fleece socks and some organic cotton underwear next.

I will work my way up to a fantastic, couture, art opening outfit someday!
Do you have a dream outfit or garment you want to sew?

-Renee

Thursday, April 18, 2013

Button, Button...

Buttons!
Looky what I found in a bin in our storage area of the garage. We went through everything last weekend, again, and got rid of more stuff! It feels good. I also found some stuff that I need, like these buttons.

I did a rather sobering exercise in time management the other day and have concluded that I need 48 hours in a day rather than the 24 allotted to us now! Actually, I gave myself a 15 hour waking day to carve into pieces. I figured that would allow time for a decent night's sleep which has become necessary to my health and good cheer. So, I looked at the time I had between 6 am and 9 pm to work with. Eating alone took a five hour chunk (3 meals). I cook from scratch by necessity and choice. I need to find some time saving solutions there. Any tips for a whole foods, gluten-free, vegan would be highly appreciated!

My sweet dog Twill requires a minimum of one and a half hours to walk throughout the day. There are extra minutes of cuddle time and such but those are always ongoing.
I have to paint and I would like to make a living at it. I am not looking for fame and great wealth, just a modest living. That means I need eight hours, six hours painting/drawing, and about 2 hours marketing. Those categories are flexible though. It didn't take long for me to fill up 15.5 hours a day. That did not include time for meditation, exercise, or day dreaming. Meditation will have to be part of my bedtime ritual and exercise will have to be included in the dog walks or beach hikes to paint.

There was no time available for sewing in the Monday-Friday schedule. Since sewing is necessary now, I have included a three hour slot in my Sunday schedule. That leaves about half a day a off a week to relax. Hmmm, not sure about that but it may work out.
So the point of all this is to say I will be sewing for three hours on Sundays. My top that I am working on has been at a stand still while I figured all of this out but I should be able to finish it Sunday.

In the meantime, I have three more books from my personal library to show. The first two are Lois Erickson books:
Both of these books contain creative solutions to belts and closures. I use them for inspiration and I am going to need that. I highly recommend taking a look through them if you can get your hands on them.
The last on was given to me by my grandmother. She gave it to me one Christmas when I was in college (my first bout as a science major) long before I decided to sew. I didn't appreciate it a lot when I received it but I am glad I kept it as it ended up being one of our textbooks in design school. It is a good basic sewing book that actually has a lot of good hand techniques. I believe this one is an earlier, 1976 edition. I occasionally refer back to it to refresh my memory on a particular technique. 
So, we shall see how the sewing goes on Sunday as well as the rest of the week under a new schedule.
-Renee

Monday, April 8, 2013

Making Progress

Amy Butler "Liverpool" tunic top in progress
I have been getting little bits of sewing in here and there. I just have the sleeves, buttons and button holes, and the hem to do. I modified this pattern by moving the bust dart quite a while ago. I was basically just guessing on where it would fall on me, well more like an educated guess. I was pretty close. Close enough that I will continue with the top and finish it but I will modify the pattern again and get the darts just right.
I tried it on and the fit is OK but I had a huge realization, this style would have suited me better about ten years ago. Funny how that works. My tastes have changed and it took sewing this up to realize that. I am in for a long journey here. The top ties in the back and I don't like the collar. It looks too little girly on me. I have to add here, I am 5'2" and just about to turn 51. I don't want to look like a little girl.
I like the fabric which is an embroidered cotton. It may have a little rayon in there too as it is somewhat drapy and medium weight.
I am thinking I will eliminate the ties and change the collar and see if I can make the top look a little less girly on me. I probably will just move on.
This is going to take a bit of experimenting and searching until I find the styles I like and that look flattering on me. I will take a pic with me in the top when I am finished.
When I finished design school in 1992, the internet was just getting started and wasn't really mainstream yet. I was pretty burned out on sewing and pretty much put it aside. This weekend I spent some time looking around the blogosphere and boy how things have changed! As I suspected, there are plenty of wonderful blogs that explain the things I have mentioned and will be mentioning here. I like couture techniques and will be incorporating them in the garments I make. The ones that fit my lifestyle and taste.
Hmmm lifestyle, that will be a challenge as it is pretty rough hewn. Well, why shouldn't I have lovely hand sewn painting clothes? I am anticipating a lot of fun making clothes to wear for performing in with the band.
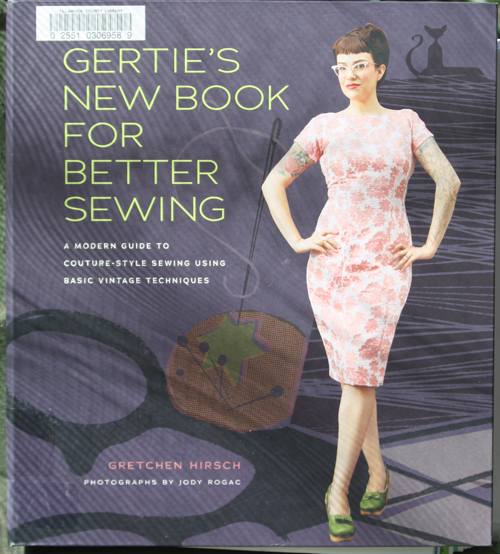
I went to our local library and browsed the new non-fiction section (usually my first stop) and I found the following sewing book:
Yep, times have changed since I last looked around in the sewing arena. I love all the changes. It is fun to see all the wonderful garments people are making these days. I really had no idea.
The book is pretty nice, well written, and the instructions seem easy to follow. I didn't find anything new for me but if you like vintage and couture techniques, this seems like a good one. I am not into vintage so much as the designs look deadly on me. The book also came with a packet of patterns which I didn't even notice when I checked it out.
I am not sure if I am going to copy any of them but I will take a look just in case!
That is all for the moment. I will keep working away and post the finished garment next.
-Renee

Thursday, April 4, 2013

Ready and ....Go!

Tilly and Twill
First up, here is my new dress form. Her name is Tilly which is the same name as the drawing manikin I have too. Tilly as in Tillamook. My sweet dog Twill is checking her out here. I live in the very north end of Tillamook County. Yes, the Tillamook cheese county. There is also a lighthouse out in the ocean named Terrible Tilly. It is an interesting bit of history and a great documentation on the folly of man.
Since a picture is worth a thousand words here is one of the reasons for the lighthouse name. Remember, this is a full sized lighthouse with room for a keeper and all.  It is now a columbarium (yes, I had to look that up!).
Tillamook Rock Lighthouse. Picture from www.lighthousefriends.com
But I digress, on to my first sewing project.
I actually started working on this tunic top a while ago and decided to tie up some loose ends and pull it out to finish it. I have to back up a bit to tell the story of this garment.
In the fall of 2009, my mate and I moved to Ashland Oregon so I could attend the Ashland Academy of Art. Ashland is home to a world class Shakespeare Festival and is a pretty little city at the foot of the Siskiyou Mountains. There is also a jewel of a fabric store there called Fabric of Vision.
Even though my sewing machine was in storage during our year in Ashland and I was busy with school, I couldn't help wandering in from time to time.
They have wonderful fabric and supplies and they make up samples from the patterns and fabric they sell, like most independent fabric stores do. One day I saw a top made from this Amy Butler pattern:
Amy Butler's Liverpool pattern. Note the pressing ham behind the pattern. A thriftstore score.
Of course, I fell for the wicked marketing ploy charming sample garment and gladly purchased the pattern. The fabric I am using is not quite as crisp as the one in the picture, which is what I deliberately chose. I will have pictures of the garment in progress soon.
I did have to do some alterations to the pattern, and this was all before the recent arrival of Tilly. The top/tunic/dress has bust darts in the front. Bust darts are worthless for me. The purpose of a dart is not only to shape the garment but to release fullness over an area that needs more room, like a full bust.
Since I do not have a full bust, I don't need a bust dart and I find them unattractive. I did a little pattern manipulation and eliminated the bust dart, shifting the fullness to a waist dart. It is a neat trick and I will have to find some good illustrations to explain it for those who have never done that. It will be in another post.
While I am on the subject of darts and neat tricks here is another one I am pleased I remembered. When sewing the darts the instructions read, "Starting at the top dot (meaning top of the dart), backstitch as you begin and stitch along the marked guidelines to the center dot. Pivot slightly and continue to to stitch stopping at the bottom dot and backstitch again."
Here is what I learned in design school. Start at the "center dot" backstitch as you begin. Sew down to end dot and take the final stitch over the fabric edge. Do not backstitch. Leave thread tails, return to center dot and sew to other end, backstitching as you begin. Finish the same way. When the dart is sewn, take the long thread tails on one end and tie a square knot snug to the fabric fold, but not so tight to pucker it. Do the same for the other dart end. For single ended darts, like a bust dart, you just stitch from edge of fabric to the dart point with the stitch over the edge like above and tie the ends. Then the dart is pressed. Here is a picture that hopefully makes it a little more clear:
Sewn dart, before pressing,(from left to right) with thread tails ready to be tied.
I know this is hard to see but the dart stitches are coming from the left and ending at the point where the thread tails are. The purpose of doing this is that there is no bulk or puckers at the dart point and it lies smoothly over the body. I trim the thread ends close to the knot leaving about 1/8-1/4 inch of thread tails. I have never had a dart come out. If you are worried about that you could put a small dot of fray-check on the knot.
I had an enjoyable afternoon working on the tunic. It is storming out and the house would occasionally shudder from a strong gust of wind. All was warm and cozy in the studio with Twill curled up nearby. The ocean is roaring and the rain pounding as I write. The occasional wind gust sets the stove pipe cap to groaning as it turns in the wind.  I will have to go check out the waves tomorrow morning with an eye to painting them if the weather permits.
I will be basting in the ties and then basting the side and shoulder seams for a quick fitting. I will take a picture at this point and post it. The top has a collar and stand. I haven't sewn one of those in years.
After this project I am going back to sew some foundation garments and then work out from there.
That is it from the sewing room for now!
-Renee

Wednesday, March 20, 2013

Gravity Fed Iron

Silver Star gravity fed steam iron.
One of the most essential tools one can have for sewing is a good iron. When I first started out, I had a Rowenta Professional iron. It was a decent iron and lasted several years before dying. Alas, when I went to replace it the Rowenta line had become popular and they didn't make them as well built as they used to. I am guessing they moved manufacturing to China.  I noticed they didn't change the price though. I was very disgusted when my new Rowenta didn't last very long nor worked as well as the first. I started buying older irons at the thrift store and fixing them.
As a design student, I had an opportunity to use some very nice professional tools and the gravity fed iron was one of them. They are not inexpensive. I saved up for this one several years ago. It is a very basic model and was about $200 at the time. Here is a couple of close-up photos:
Water tank
Iron with silicone coated shoe.
I did a quick search online and found a similar model on eBay for $119 dollars. I didn't recognize the brand name, Consew, that is associated with it. Perhaps it was bought out.
The concept is fairly straight forward. The large water tank holds about a half gallon of water. The iron itself weighs about 4 lbs. It is heavier than it looks. You press the button on the handle with your thumb and clouds of forceful steam come forth.
When I used this in my internship with a custom bridal business, we used it on every kind of fabric, including the silk fabrics we worked with most of the time. It has the usual fabric settings and I never scorched a thing with it, even pressing delicate sari silks with real gold thread.
Most importantly, it is heavy enough to get a good press. A good press vs. ironing, is what you need when sewing.
It is now all set up and ready to go. I will also note here that my ironing board is a heavy duty Mary Proctor ironing board that I scored at a thrift store for $7. I love this ironing board. It has wings that fold into different configurations and has a large surface to iron on. It is heavy and contains its own plug to plug your iron into. I don't use that feature as this iron needs a good plug and I was not certain that the connection was heavy duty enough. They don't make them anymore and my husband was puzzled when we were pairing down our stuff why I didn't want to let it go.
Here are a couple of quick photos:

The ironing board has been in storage and moved here and there so needs a new cover and a bit of cleaning up. The top photo is with the front corner folded down, the bottom with it up. There is a side panel that folds down but I always have it up to get the nice width. There is a cord holder cleverly stored and folded on the underside along with the cord to plug the board in. I am thinking that when I make a new cover I will have to take better pictures to explain and show off this gem of an ironing board. 
Of course, the ultimate in pressing equipment would be a vacuum pressing table. That starts running into big bucks and needs room.
A quick note on my dressform and then I am off to walk Twill. I worked on it last weekend and after taking precise measurements and fiddling around with the one I made about 20 years ago, I decided that I needed a new dressform. I had some credit at Amazon so I ordered an adjustable Dritz My Double Delux dressform. One of these days I would love a professional one with collapsible shoulders but for now the Dritz will do. I will give the details of  why I decided to go that route in a post when the dressform arrives.
Off to walk in the stormy weather, -Renee

Saturday, March 16, 2013

Inspiration

I will be working on my dressform this weekend (my weekends are Sunday and Monday). I have a few simple projects to start out with to get me back in the groove of sewing. My sewing nook is in the corner of my now clean and organized art studio. This means that I can take a 10 or 20 minute break from painting and step a few steps over to the sewing machine. Although I don't own Nancy Zieman's book 10-20-30 Minutes to Sew, I am thinking that concept will be necessary for me to make progress.
In the meantime, I pulled a few of my books out to share. These are a few of the inspirational books I own. I know a lot of inspiration can be found online but there is nothing like sitting with a hot cup of tea on a stormy day and looking through books and magazines. Here are some of my favorites in no particular order:
These two books draw from ethnic traditions. The embellishments are gorgeous. I hope to make one or two special outfits that I can embellish. Embellishment can really set a garment far above the ready to wear stuff one sees in the stores, even on the designer level.

Ah now these, these are treasures. A wonderful, thoughtful, creative friend of ours brought these French fashion magazines back from Paris and gifted them to me. The top left one is from 1925. The top right and bottom one is from 1917! There was a bonus of a genuine pattern in the pages of the one from 1917. Later on I want to copy it and make it up for fun. I might even just make a free PDF of it as well sometime down the line.
Couture can be exquisite and I love putting in professional hand sewing techniques into my garments. Again, this sets them far above what can be found in the stores and is one of the reasons, in my view, to sew ones own clothing. I will definitely share any techniques I use on this blog. Sharing is part of the fun!
Between the weather and tides I haven't had a chance to get outside and paint. Thankfully I do get out everyday with the dog or else I would be climbing the walls! It has been a good time to clean, organize, think, dream, and plan.
Looking forward to fixing up my dressform. The next set of books I share will be on patternmaking and design. I have a good number of those and some of those are out of print.
Off to post on my Coastal Vegan blog and then dinner.
-Renee

Saturday, March 9, 2013

Getting Ready Getting Set

A happy Pfaff.
I took a much needed break from painting today and re-organized the sewing area of my studio. My sewing machine is a Pfaff Creative 1469. We bought it the first few months of our marriage in 1984 and we will be celebrating our 29th Anniversary this year! It was one of the first computerized machines Pfaff made and has an all metal body, which I really like. The one thing I don't like about it is that it doesn't have the wonderful built in walking foot that nearly all the other Pfaff machines have. I like the machine, it has worked quite well although I did have to have the mother board replaced five years or so ago. If I was to buy another one, I would go with something not so fancy, just a sturdy work horse and not computerized. I don't need or use all the fancy stitches.
I had to do a bit of tinkering with the machine. The presser foot was sticking and wouldn't go down all the way or stay down. I tried shooting a bit of WD-40 where I could reach but it wasn't getting to where it was needed. So, I carefully unscrewed and removed the top and was able to get in there with a shot of carefully aimed WD-40. After working the presser foot up and down for a short bit it worked like a dream. I happily replaced the top and screws and she is ready to sew! (note: I only recommend doing this if you are brave and have experience with tools)
I also had a chance to organize some of my patterns (many of my older patterns are in a bin in the storage area of the garage). I was pleased to see many I can use, at least to get me started. I am a bit rusty in the sewing department. Fortunately, that college degree I mentioned was unusual in that we were required to take several quarters of sewing in addition to design and patternmaking. Not all schools do that, surprisingly.
Even though I have thinned out and greatly reduced much of my fiber and fabric stash, I have enough nice fabrics to make a solid wardrobe! It looks like the money outlay will be minimal...to start with.
I own a dream of a professional iron which I will share when I figure out the best place to install it. There is a hint for you, it needs a teeny bit of installation. That is all I will say for now.
I looked through my books and it was like a reunion with dear old friends. I even found a pattern for making a very important half size dress form for designing on. The pattern is from Mary Roehr. I picked it up years ago at the Sewing Expo in Puyallup, WA. I am not sure she sells them anymore.
This is kind of a longish post but I wanted to start properly at the beginning so I am going to also include my general wardrobe needs. I kid you not when I say all I have are a couple pair (as in 2) of jeans, about four long sleeve t-shirts, 4 fleece vests (thriftstore), a bit of rain gear that badly needs updating for protection, and that is about it except for a miscellaneous garment or two from the thriftstore and one or two pair of shorts and short sleeved t-shirts.
So here are my basic needs and a bit of very personal information. I am a petite 5' 2" with a long waist and an hour-glass figure. I have small breasts which makes it a bit easier to fit in a lot of designs. Designs with a bit of waist definition look the best on me and straight, tent like, and empire-waisted garments look dreadful on me.  The small stature with a long waist has caused no end of fitting problems in the ready-to-wear department.
I want to be comfortable too. I do not wear conventional bras, they are too painful for me. Fortunately with small breasts I can get away with it but I like my garments to be modest in that area.
I have a very active lifestyle. I walk the dog in all weather several times a day, everyday. I am out painting in rain, hail storms and squalls. I hike to painting areas with a heavy pack. I want to look nice but comfort and protection are equally important.
Most of my life is outdoor and casual but I also need something dressier for when I am minding a gallery or going to art show openings. I am also in a band, The Sedona Fire Band, which plays world-folk fusion and need fun and funky wear for that while playing the cello (yeah, the cello, not a lady-like position while playing).
Well, I think I have laid out my basic needs for now. I have a few ideas and am collecting visuals on my Pinterest board, which reminds me, I will be filling out the blog with more bells and whistles in the days to come.
So why all this information? This is some of the stuff I needed to know about a client when I did a very short stint sewing professionally. I will get more specific in the next post. It should be a good adventure!
-Renee

Thursday, March 7, 2013

The Beginning

At the beginning
ARRRGH! I need another blog like I need a hole in my head! I am almost embarrassed to admit that this blog makes...four. Okay, my ReneeWeaves! blog is in mothballs and I plan to link that blog to this one. My Coastal Vegan blog has very few posts but I will be adding to that soon. My main blog, my art blog at Art=Life is still going strong and will continue to do so.
I have basically decided to blog my life, in three parts. This blog is all about crafting something for me to wear and sharing the skills to do so therefore, rolling up my sleeves, let's get to it.
So here I am above. I took this picture this very afternoon. I would love to say that I am wearing my paint clothes here. Well, actually I am but they are also my every day clothes. Yep, jeans, long sleeved v-neck tee and a fleece vest from the thrift store.  This is basically my uniform at the moment. I will be talking about the concept of a uniform later.
Looking at this picture, I bet you would never know that I actually have a BA in apparel design! Yep, I do. Graduated with honors no less!
I am standing next to a My Twin dressform I made about 20 years ago. I am not much heavier than I was back then but things have definitely changed shape and have been redistributed. The padding you see on the dressform was a quick fix I stuck on about two years ago. She definitely needs a lift. Ignore the paintings, brushes, easel and such behind me. That is all on my art blog.
So, what has pushed me over the edge to the point that I would start yet another blog and project? Besides the lack of clothing to wear? 
I will be brief, I got inspired.  The following inspirations are not in any particular order.
  • Inspiration #1: my friend and fellow fiber enthusiast Theresa over at Camp Runamuck. I am always oooing and ahhing over her many completed and well executed sewing projects. I hope you read this Theresa! You are one of my inspirations and I am finally going public so I can do something about my own sad and scanty wardrobe.
  • Inspiration #2: Anita Mayer. (link to YouTube video preview) Anita has long been my secret mentor. I was privileged to live in the same area as Anita for many years and took several workshops and occasionally ran into her while shopping at the local food Co-op. She has books, I found a new video (see link above), and I believe may still give workshops. If you are ever so lucky as to have the opportunity to take a workshop from her, do so. 
  • Inspiration #3: Fibershed.  Holy moly, I love this concept. Take time to explore this site. To be truthful this was the catalyst that made my head explode with this idea. I don't know if I will be able to find all I need in such an isolated area as I live but I am going to try.
Finally here is what I bring to the table and what I hope to share, besides a new wardrobe.
I know how to sew and tailor of course BUT I also know how to drape a pattern to make an original design. I can also do pattern making, that is flat-pattern making, but I really prefer draping. There are tutorials out there, this will be mine. 
I have many books and resources to share, not to mention enthusiasm and love of beauty. I also weave, spin, and dye but not as much as I used to.
I have quite a wardrobe that needs to be built in order to meet my daily life needs. I will get into that on another post.

I will soon be 51 years old. It is about time I had something nice to wear, don't you think?

Much more to come!

-Renee